Difference between revisions of "Magna valve stem seal replacement"
Cartman02au (talk | contribs) |
Cartman02au (talk | contribs) |
||
| (One intermediate revision by the same user not shown) | |||
| Line 26: | Line 26: | ||
[[Category: Second Generation Workshop]] | [[Category: Second Generation Workshop]] | ||
[[Category: Third Generation Workshop]] | [[Category: Third Generation Workshop]] | ||
| + | [[Category: Astron Engines]] | ||
| + | [[Category: 6G7 Engines]] | ||
Latest revision as of 02:35, 13 September 2020
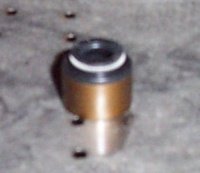
Valve stem seals are used to stop oil from dripping down the valve guides and into the bore. They sit on top of the valve guides, where the valve stem slides in and out.
As with any rubber seal, with age they can perish and begin leaking. When this happens, the engine will start to blow small amounts of blue smoke, mainly at startup or if the car has been idling for long periods. This is because oil seeps into the combustion chambers.
Many think that replacing the valve stem seals is a major job and requires pulling the head off (and thus replacing the head gasket). This is not the case on the engines used in the Magna.
This page discusses valve stem seal replacement with the head still bolted to the block. This can be done using nylon rope or a spark plug hole attachment for an air compressor to hold the valves up.
Doing the job
- Remove the rocker cover(s) to gain access to the top of the head. On V6 models work on one bank at a time.
- Unbolt the rocker assembly, ensuring that you do not drop the hydraulic tappets out of the rocker arms. You may use PVC tape or special lash adjuster holders to ensure this or use due care.
- Once you can gain access to the top of the valve feed a length of nylon rope into the cylinder through the spark plug hole. Ensure you have enough left over to pull it back out. Wind the engine over until it is tight - the valve will be held in place by the rope. If using an air compressor, make sure that you have no air leaks and that the compressor can keep up the required air pressure.
- Using an overhead valve spring compressor, compress the valve spring and remove the collets.
- Once the valve spring is clear, the valve should sit there by itself if you have correctly held it up with compressed air or rope. If it drops, obviously this hasnt been done properly and you now have to pull the head off to retrieve the valve.
- Remove the valve stem seal from the top of the valve guide gently with a pair of multi-grips or pliers. Discard the seal.
- Lubricate the valve stem and seal with oil, slide the new valve stem seal over the valve stem and into position. Use a valve stem seal installer or a long socket to gently tap the seal down. Do not damage the seal. If you do it will leak.
- Reinstall the valve spring and collets. When reinstalling make sure that the aligning mark on the valve spring faces the rocker arms
- Repeat the procedure from step 4 for this cylinder's other valves
- When all valves on this cylinder have had their seals replaced, move to the next cylinder and repeat from step 3.
- When you have done all cylinders, replace the rocker assembly and rocker cover.
Notes: The multivalve engines used in the Magna/Verada use different valve stem seals for exhaust and inlet valves. These are typically colour coded so be sure to ask your part's supplier which is which when you pick the seals up.
